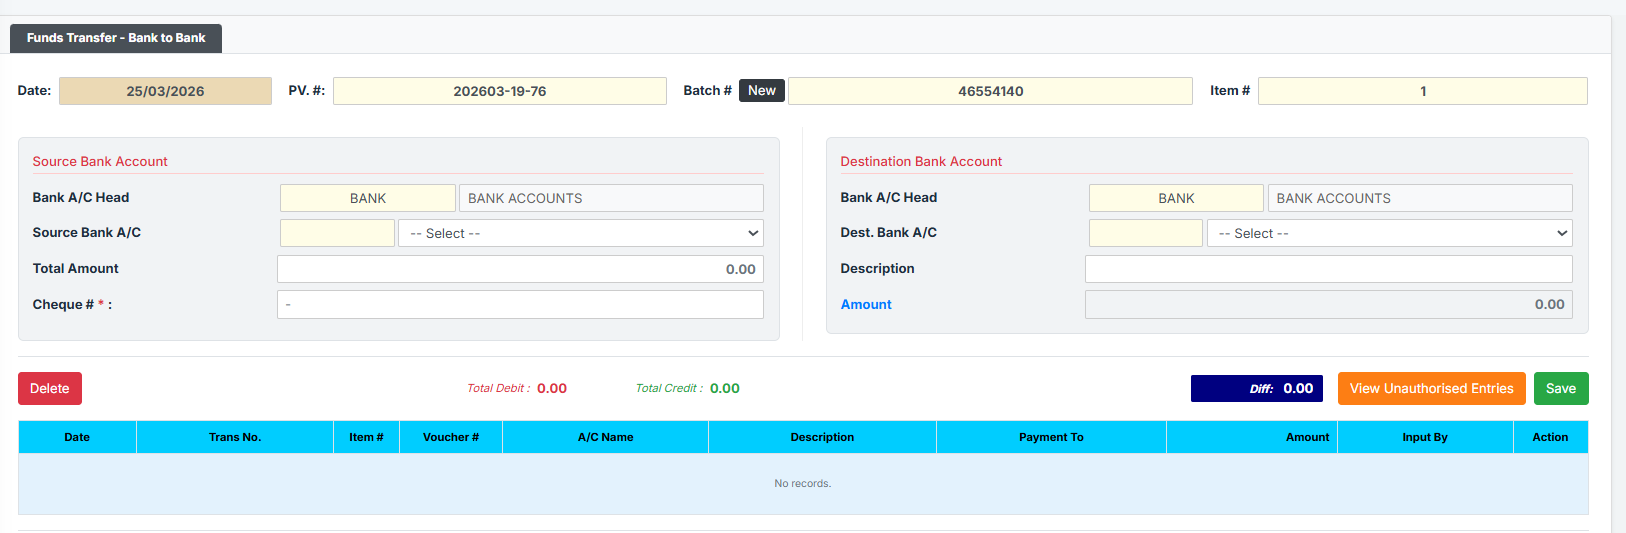
The Bank to Bank Transfer page allows back-office staff to securely transfer funds from one internal branch bank account (Source) to another internal branch bank account (Destination). This module uses a strict dual-entry system to accurately debit the destination account and credit the source account while maintaining a rigid audit trail containing batch numbers, voucher numbers, and the required Cheque or Reference number.
PURPOSE
- Move funds between distinct branch bank accounts (e.g., from a clearing account to a main operating account).
- Ensure every transfer is backed by a physical/digital reference (like a Cheque #).
- Automatically balance Debit and Credit sides of the transaction.
- Prevent data entry errors by auto-synchronizing the Transfer Amount and Descriptions between the source and destination.
STEP-BY-STEP GUIDE
Step 1 — Start the Transfer
- Navigate to the Teller Module or Back Office Module and selectBank to Bank Transfer page.
- The top header will automatically assign the Date, generate a PV. # (Payment Voucher), and generate a Batch #. (If you need to discard the current entries and start a fresh transaction, click the black New button next to the Batch #).

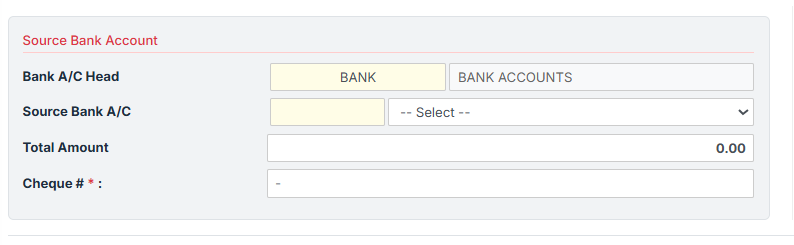
Step 2 — Select the Source Account (Credit) In the left column (Source Bank Account):
- Source Bank A/C: Select the bank account from which the funds are being taken (the credit side) from the dropdown list.
- Total Amount: Type the exact amount you wish to transfer. (Note: As you type this amount, the Destination Amount on the right side automatically updates to match it).
- Cheque #: Enter the cheque or reference number for this transfer. This is a mandatory field for all bank-to-bank transfers.
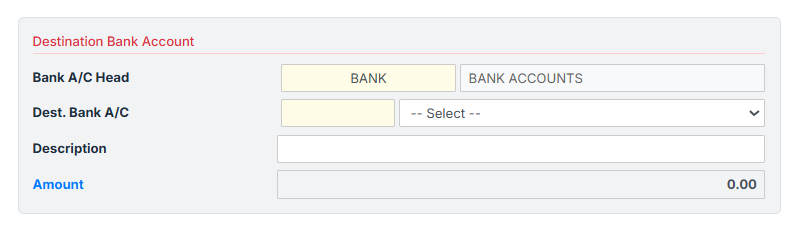
Step 3 — Select the Destination Account (Debit) In the right column (Destination Bank Account):
- Dest. Bank A/C: Select the bank account that will receive the funds (the debit side) from the dropdown list.
- Description: Enter a clear reason for the transfer (e.g., “Sweeping funds to main operating account”). (Note: The system automatically copies your description to the hidden “Payment To” field behind the scenes).
- Verify that the read-only Amount matches your source Total Amount.
Step 4 — Verify Totals and Save
- At the bottom of the form, verify that the Total Debit (red) and Total Credit (green) match, leaving the Diff box at
0.00.


- Click the green Save button.
- Upon success, the entry will be logged into the table below and form fields will be cleared so you can begin the next transfer.
Step 5 — Managing Saved & Unauthorised Transfers
- Transactions placed into the table automatically drop into an “Unauthorised” state pending supervisor approval.
- Recall / View Unauthorised: Click the blue View Unauthorised Entries button to view pending transfers. Click the blue SELECT button on any row in the popup to recall that unapproved batch into the main form.


- Edit / Delete: When you recall a transaction, the fields are locked to prevent accidental changes. Click the blue Edit button to unlock the fields and make changes. If you need to erase it entirely, click the red Delete button to permanently erase the recalled batch.
KEY NOTES
- No Cash Denominations: Because this is strictly a Bank-to-Bank electronic/cheque transfer, the Cash Denominations prompt used on other teller pages is disabled.
- Auto-Sync Fields: To prevent accounting imbalances, the Destination Amount is locked (read-only) and completely synchronized with whatever you type in the Source “Total Amount” field.
- Validation: You cannot save the transfer without selecting both a Source and Destination account, providing a valid amount > 0, and entering a Cheque #.