The Restrict Customer Account module is a high-security administrative tool used to place selective or total operational blocks on customer accounts. Whether due to legal orders (Garnishment), internal investigations (Fraud suspicion), or administrative requirements (KYC updates), this module allow supervisors to toggle specific transaction permissions. Restrictions can range from preventing a single withdrawal to a total “Post-No-Debit/Post-No-Credit” (PND) freeze across all account activities.
PURPOSE
- Secure institutional assets by freezing suspicious accounts.
- Enforce legal and regulatory mandates (e.g., Court orders).
- Prevent unauthorized withdrawals while still allowing deposits if needed.
- Maintain a strict audit trail of why an account was blocked and by whom.
- Facilitate a formal “Unblocking” workflow with required administrative justification.
STEP-BY-STEP GUIDE
Step 1 — Accessing the Module
- Navigate to Customer Records and select Restrict Customer Account via the sidebar.
- The main screen shows a list of currently restricted customers and their restriction dates.
Step 2 — Selecting a Customer to Restrict
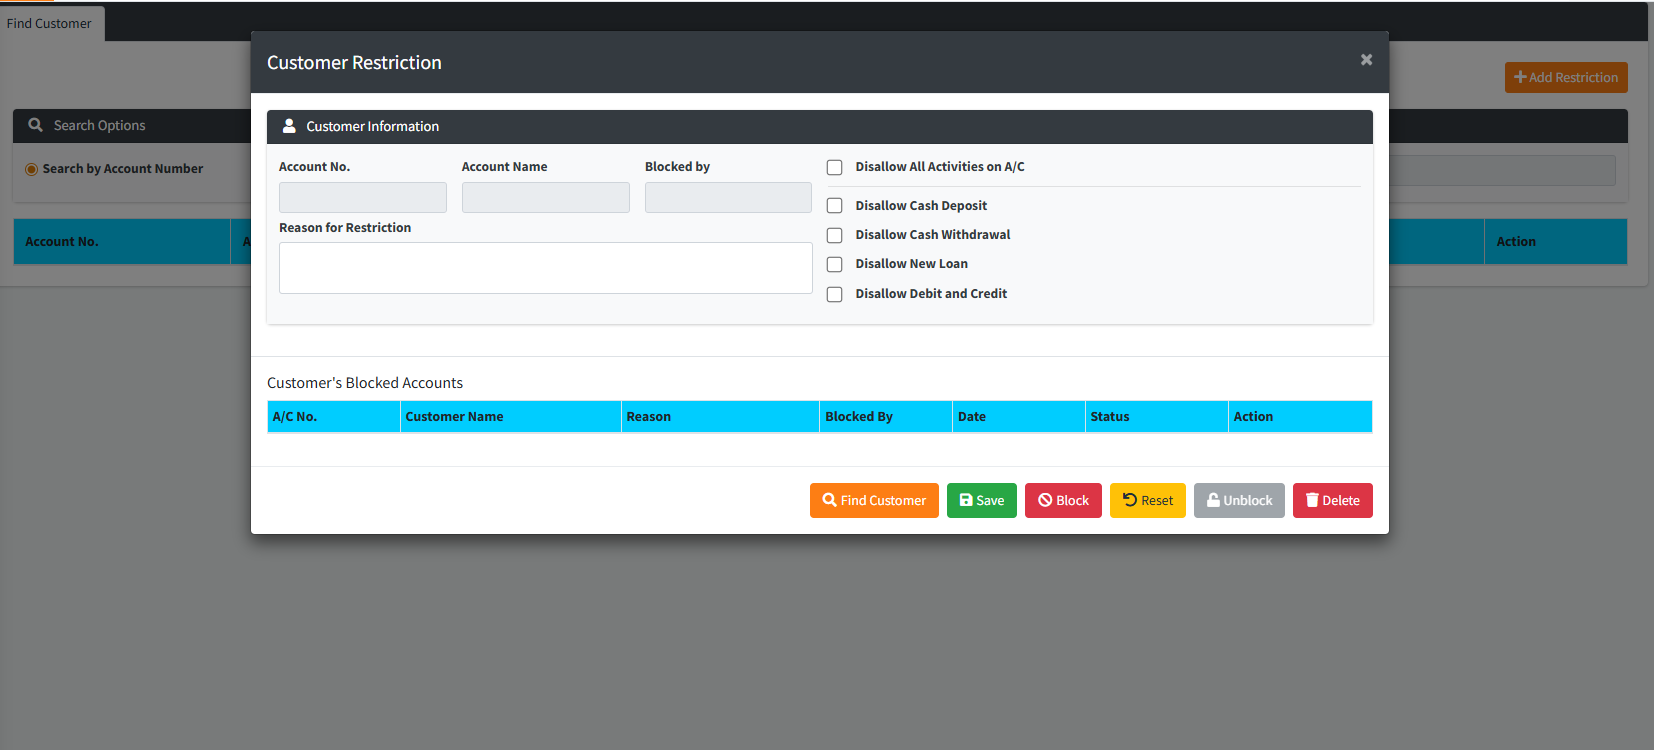
- Click the Add Restriction button.

- Click Find Customer in the modal footer.
- Search for the account name or number and click Action to load their details.
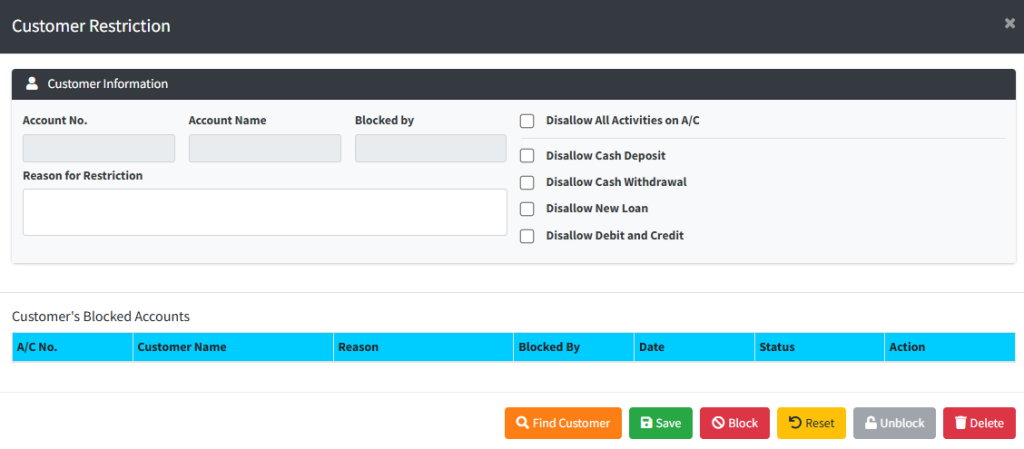
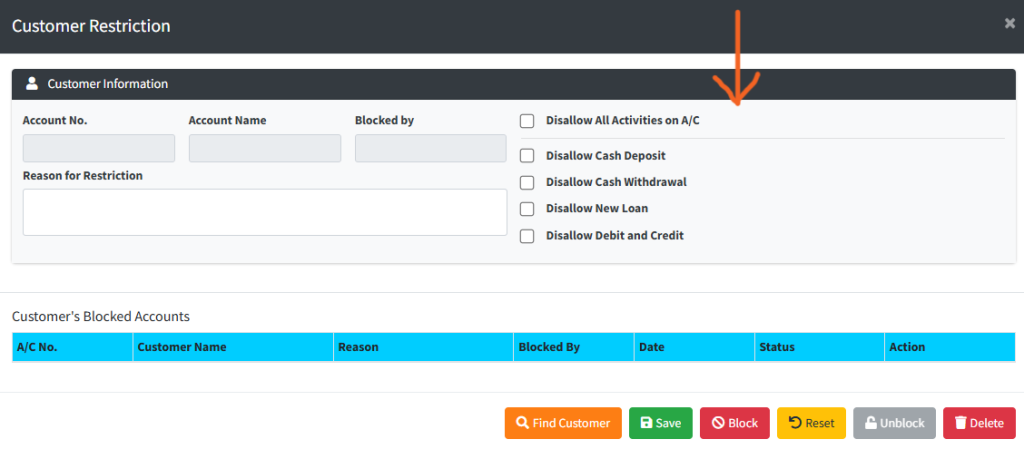
Step 3 — Defining Restriction Parameters Once the customer is loaded, select the specific type of block from the checkboxes on the right:
- Disallow All Activities on A/C: The most severe block; prevents any interaction with the account.
- Disallow Cash Deposit: Prevents the customer from adding funds.
- Disallow Cash Withdrawal: Prevents the customer from taking money out (useful for lien placements).
- Disallow New Loan: Prevents the credit department from processing any new loan applications for this client.
- Disallow Debit and Credit: A total freeze on both manual and automated transactions (PND).
Step 4 — Documenting the Reason
- In the Reason for Restriction box, enter a detailed explanation (e.g., “Pending KYC verification” or “Court Order Case #123”).
- Note: This field is mandatory for audit purposes.
Step 5 — Saving & Blocking
- Click Save to store the draft restriction.
- Click the Block button to activate the restriction in the pending queue.
- System Action: The account will now trigger a “Restricted” warning whenever a teller attempts to process a transaction for this customer.
Step 6 — Unblocking an Account
- To lift a restriction, select the customer from the main list.
- Enter the Reason for Unblocking in the provided text area.
- Click the Unblock button.
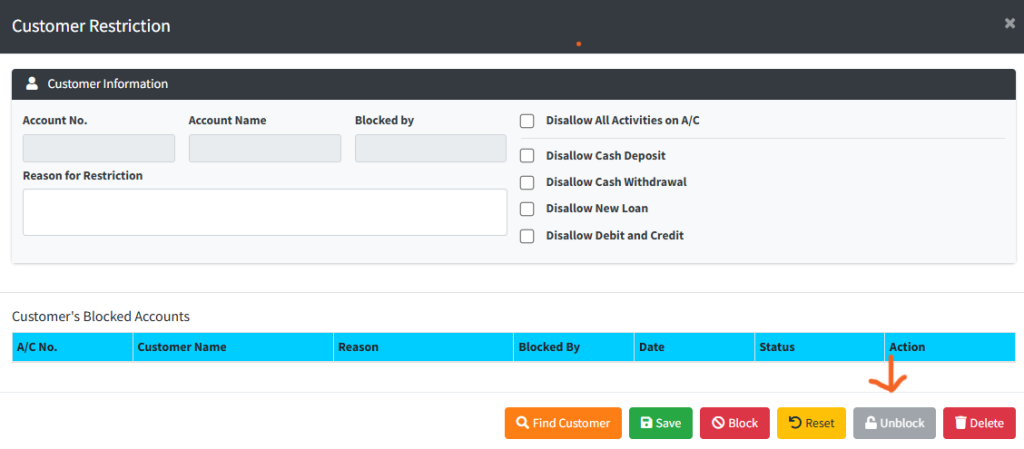
- System Action: Like blocks, unblocking requires final verification on the Restriction Authorization page.
KEY NOTES
- High-Level Warning: Tellers and field officers will see a bright warning popup if they attempt to transact on a restricted account. The system will physically prevent the “Save” action on deposit or withdrawal forms.
- Multi-layered Security: Placing a restriction is an “Input” action. The restriction only becomes legally active in the system’s ledger once it is approved by a secondary officer on the Auth Restrict Customer page.
- Historical Audit: Even after an account is unblocked, the history of previous restrictions remains in the database for compliance reporting.