The Expense Payment (Expenditure Cash Book) page enables tellers and back-office staff to process outgoing payments for branch expenses. The module properly debits selected General Ledger (GL) expenditure or asset accounts, and credits either the Teller’s Cash Till or a designated Bank Account. It natively handles single and multi-entry expense vouchers, withholding tax computations, and mandatory cash denomination verification.
PURPOSE
- Record administrative and operational expenses (e.g., fuel, stationery, utilities).
- Credit the teller’s Cash Account (for cash payouts) or a Bank Account (for cheque/transfer payouts).
- Debit the corresponding GL Account(s) for the specific expense line items.
- Automatically calculate and apply Withholding Tax.
- Provide a unified grid to track sub-items under a single Payment Voucher (PV) Batch.
STEP-BY-STEP GUIDE
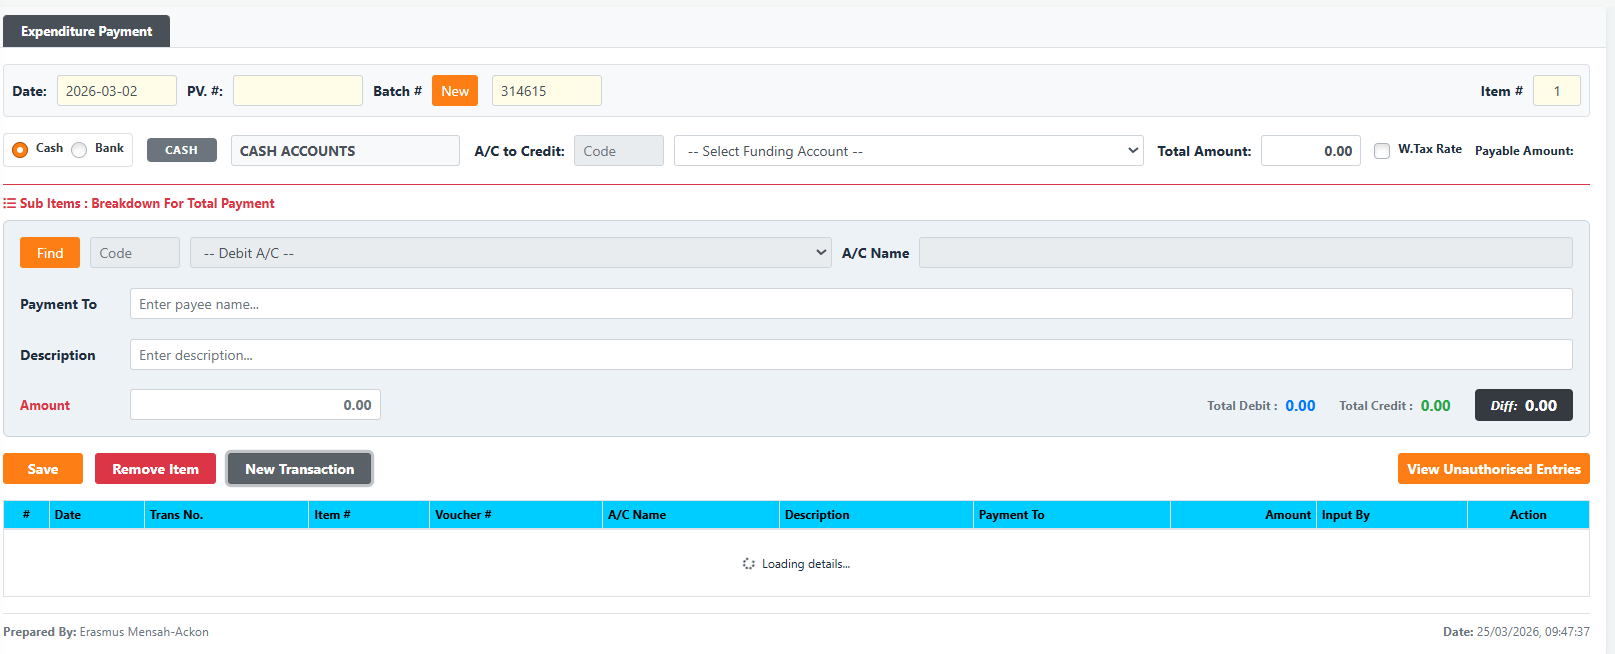
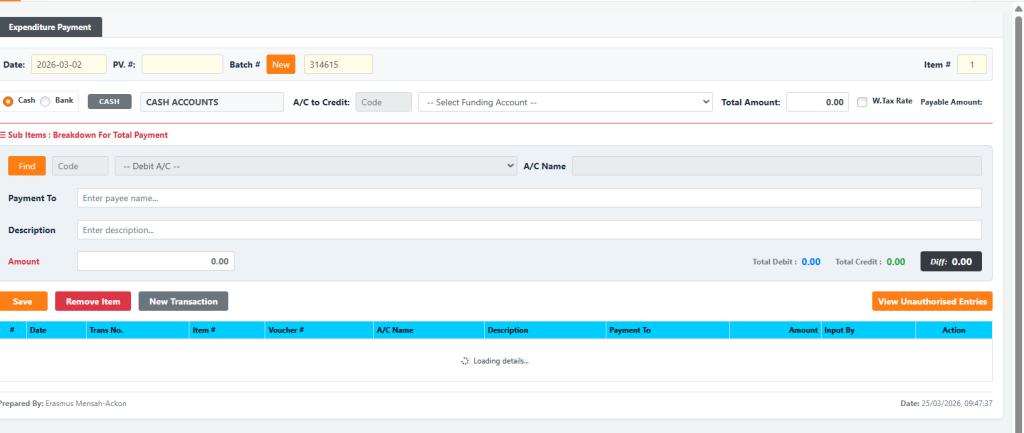
Step 1 — Start a Transaction
- Open the Teller Module or Backoffice Module and select Expense Payment.
- By default, the system automatically sets the Date, generates a unique Batch #, and fetches a rolling PV. # (Payment Voucher Number) for you. (If you are already on the page and want to refresh these values for a new payment, click the gray New Transaction button near the bottom).

Step 2 — Set the Main Payment Header
- Entry Type: Select Cash or Bank.
- If Bank is selected, a “Chq #” field will appear for you to enter the cheque number.
- A/C to Credit: Select your funding account from the dropdown. This dynamically updates to show either your Cash Accounts or Bank Accounts based on Step 1.
- Total Amount: Enter the total gross amount of the voucher.
- W.Tax Rate (Optional): If the payment incurs withholding tax, check the box and enter the percentage rate. The system calculates the deduction and displays the final Payable Amount.
Step 3 — Add Expense Sub Items
Now, you must provide the specific expense breakdown that sums up to the Total Amount.
- Click the blue Find button (or press F2 on your keyboard) to open the General Ledger (GL) Lookup.
- Search and click the blue SELECT button on the desired Expenditure or Asset GL account name.
- Payment To: Enter the name of the payee/vendor.
- Description: Enter the justification (e.g., “Payment for branch fuel”).
- Amount: Enter the specific amount for this line item.
Step 4 — Save and Cash Denomination
- Click the blue Save button (or press F6 on your keyboard).
- If this is a Cash entry, the Cash Denomination window will automatically pop up upon saving the first line item.
- Denomination Verification: Enter the exact physical bank notes and coins you are handing over. The
Deno. Totalmust exactly match theTrans. Total(which is the Payable Amount). Click Save Denominations.
Step 5 — Managing Multiple Items & Unauthorised Entries
- Your saved sub-item drops into the table at the bottom of the screen. The form fields will lock to secure the transaction.
- You can repeat Step 3 to add more items under the same PV# until the
Total Debitequals yourTotal Credit(and Diff is 0.00). - Removing a Line Item: Click any row in the table to highlight it, then click the red Remove Item button to delete it.
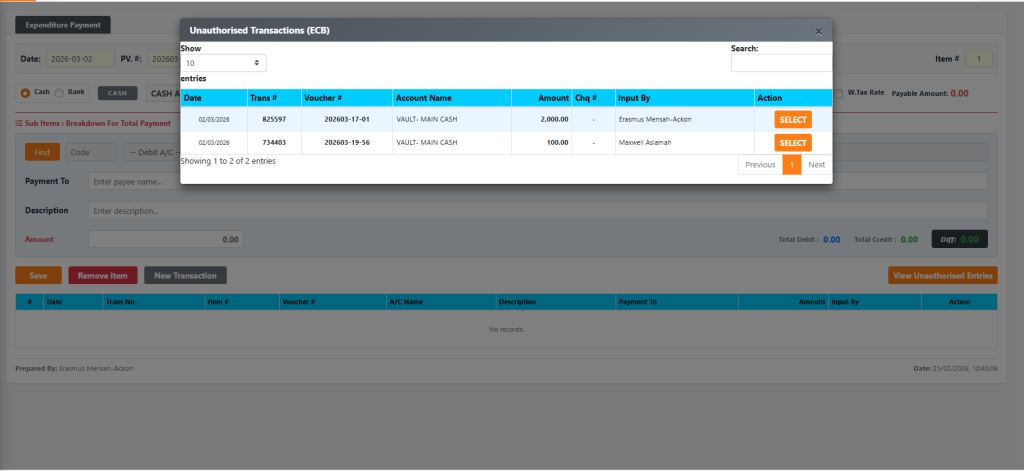
- Recall / View Unauthorised: Click the blue View Unauthorised Entries button to see any pending batches. From there, you can click SELECT to recall them back into the form for editing.

KEY NOTES
- Keyboard Shortcuts: You can use F2 to quickly pop open the Find GL window, and F6 to trigger the Save action.
- Tax Computations: The system intelligently separates the Total Amount (Gross expense posted to GL) from the Payable Amount (Physical cash handed out after withholding tax).
- Last Item Deletion: Warning! If you delete the only line item in the table using the red “Remove Item” button, the system will automatically wipe the entire Batch # alongside it and reset the form.