The General Ledger module is the architectural core of Sikasoft’s accounting system. Located within the Admin Setup menu, this module allows high-level administrators to create and manage the Chart of Accounts. It utilizes a highly structured, hierarchical approach—from broad Account Types down through Account Heads and multiple layers of Sub-Accounts—ensuring that every transaction is routed to the exact, correct ledger balance.
PURPOSE
- Establish and maintain the institution’s official Chart of Accounts.
- Enforce a strict hierarchy for financial reporting (Type -> Head -> Sub1 -> Sub2 -> Sub3).
- Provide nested, on-the-fly creation of ledger categories without breaking the data-entry workflow.
- Enforce an Authorization workflow (Pending/Unauthorised vs. Authorised) to prevent accidental or malicious alterations to core accounting structures.
STEP-BY-STEP GUIDE
Step 1 — Navigating the Dashboard
- Navigate to the Admin Setup module via the main navigation sidebar, and select the General Ledger page.
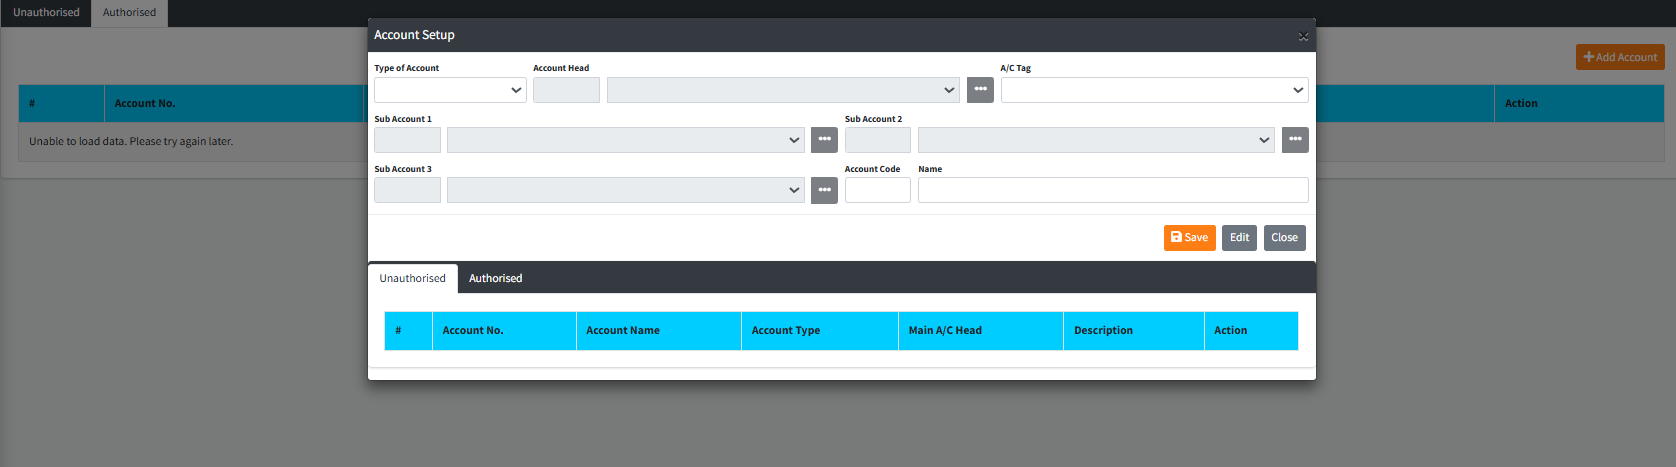
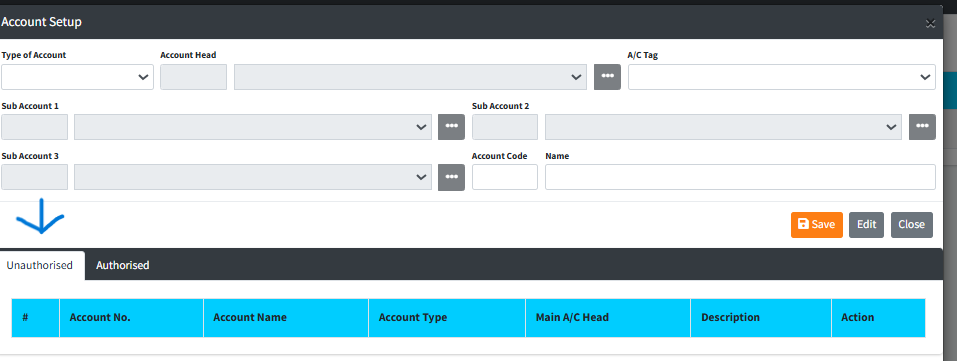
- The main dashboard is divided into tabs: Unauthorised (pending creation/modification) and Authorised (active, live ledger accounts).
- The table displays current chart structures:
#,Account No.,Account Name,Account Type,Main A/C Head,Description, andAction.

Step 2 — Initiating Account Creation
- Click the orange Add Account button at the top right of the dashboard.
- The Account Setup modal will open, initiating the hierarchical creation process.

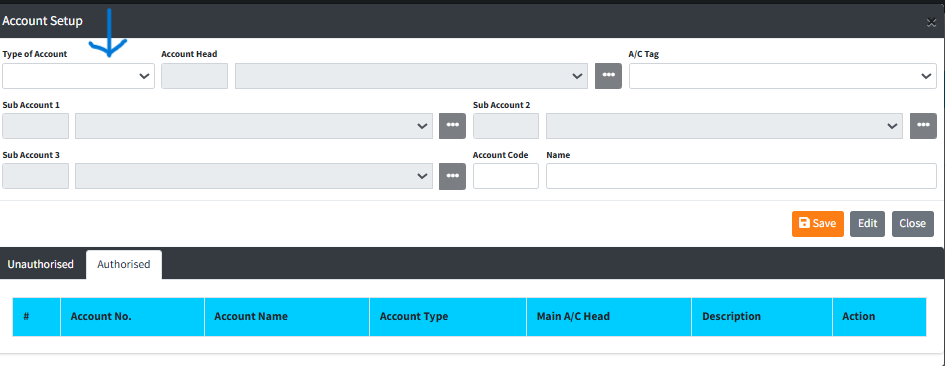
Step 3 — Defining the Account Hierarchy The system requires you to build the account from the top of the hierarchy down.
- Type of Account: Select the broad category (e.g., Asset, Liability, Equity, Revenue, Expense) from the dropdown.
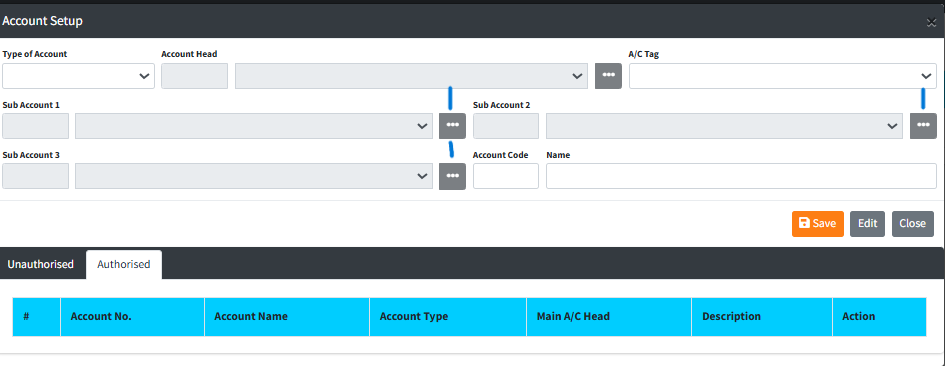
- Account Head: Select the specific reporting branch. (Note: If the desired Account Head does not exist, click the dark ellipsis
[...]button to open the Account Head nested modal and create it).

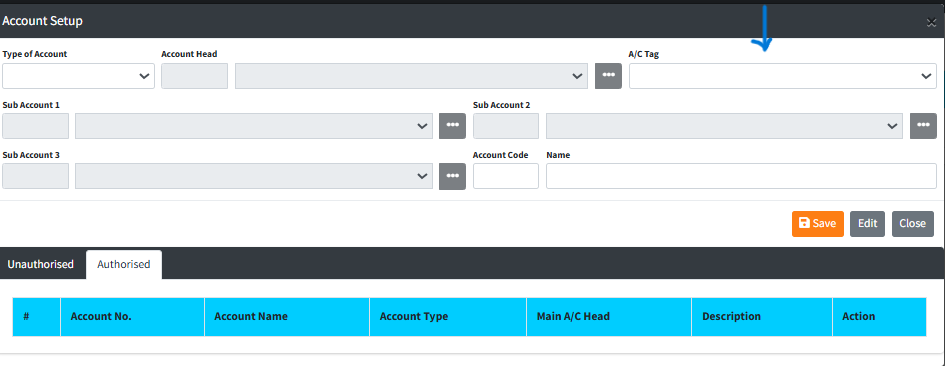
- A/C Tag: Select the appropriate accounting tag for financial reporting categorization.
- Sub Accounts (1, 2, and 3): Sequentially select the necessary sub-account levels to build the specific ledger path. (Note: Sub-account fields dynamically unlock based on the previous selection. You can create new sub-accounts on-the-fly using their respective
[...]ellipsis buttons).
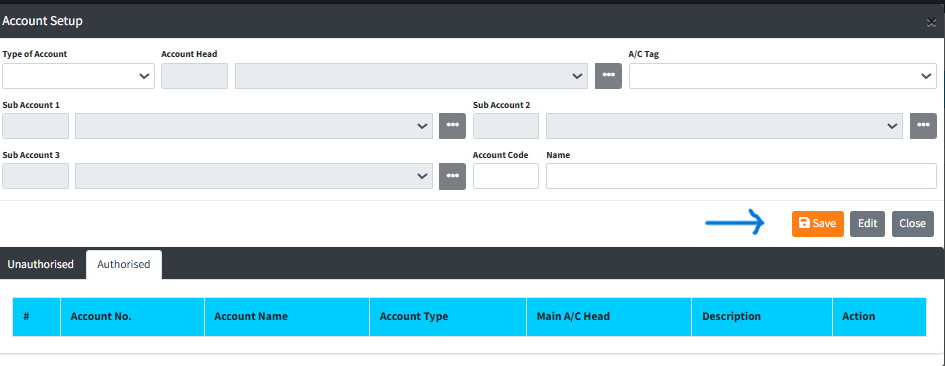
Step 4 — Finalizing Account Details
- Once the hierarchy is defined, navigate to the bottom right of the modal to the A/C Code & Name section.
- Provide a descriptive, formal Name for the final ledger account.
- Verify the generated Account Code.
- Click the blue Save button in the modal footer to register the account.
Step 5 — Authorizing the Account
- Newly created accounts are placed in the Unauthorised tab.
- They will not be available for transactions until they are reviewed and approved via the central Authorization module by a secondary administrator.
KEY NOTES
- Strict Hierarchy: The account structure is rigid by design. You cannot bypass Sub Account 1 to create a Sub Account 2. The fields will remain disabled until the preceding layer is satisfied.
- Nested Modals: The
[...]buttons open stacked modals (e.g.,Sub Account 1 Modal). You can define a new sub-category, save it, and upon closing the nested modal, your new category will be immediately available in the main Account Setup dropdown. - Edit Mode: To modify an existing account structure that you’ve recalled from the dashboard table, you must click the grey Edit button in the modal footer to unlock the form fields before saving.