The Registration module is the primary engine for onboarding new clients into the institution. Built as a high-fidelity “Wizard,” it guides officers through the comprehensive Know Your Customer (KYC) process for both Individual and Corporate (Entity) clients. The system enforces data integrity through a multi-step roadmap, capturing everything from biometric-linked personal details to anti-money laundering (AML) disclosures and signatory mandates.
PURPOSE
- Standardize the capture of customer biodata and corporate documentation.
- Implement a rigid KYC (Know Your Customer) framework to meet regulatory compliance.
- Facilitate “Wizard-based” data entry to ensure no critical section is skipped.
- Link customers to field agents (Mobile Bankers) for decentralized relationship management.
- Capture extended information through sub-registries (Next of Kin, Signatories, Shareholders).
- Provide a dual-state authorization flow where registrations must be verified by a supervisor before the account becomes active.
STEP-BY-STEP GUIDE
Step 1 — Selecting Registration Type
- Navigate to Customer Records on select customer Registration via the sidebar.
- A selection modal will appear. Choose between Individual Customer, Entity, or Gender Classification.
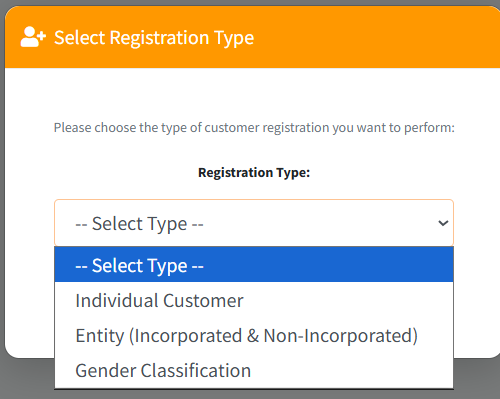
- Click Proceed to launch the specific wizard.
Step 2 — Individual Onboarding (The Wizard Roadmap) Follow the sequential steps on the left-hand roadmap:
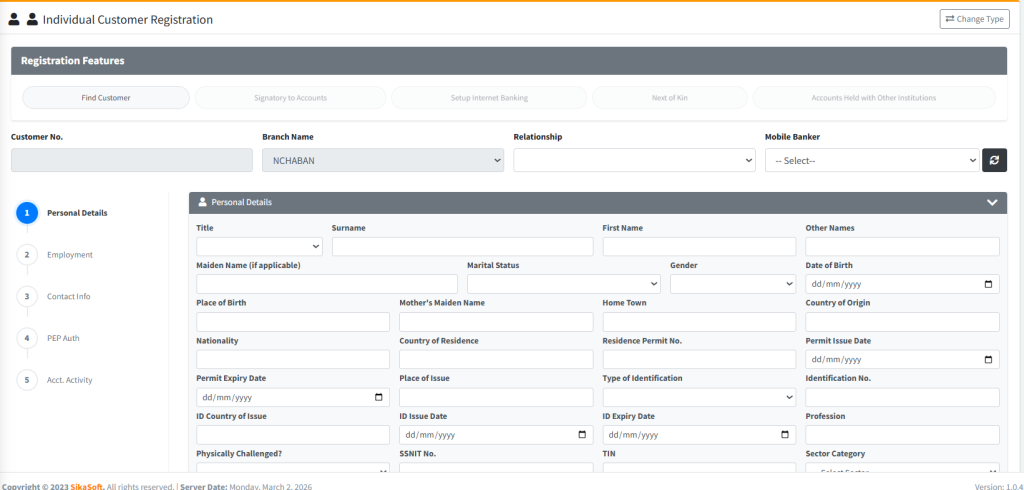
- Personal Details: Enter Name, DOB, Gender, and Nationality. Note: Identification details (e.g., Ghana Card) are mandatory.
- Employment Details: Capture the applicant’s occupation and employer information.
- Contact Info: Enter residential addresses, digital addresses (GPS), and phone numbers.
- PEP Auth: Document any “Politically Exposed Person” status for AML compliance.
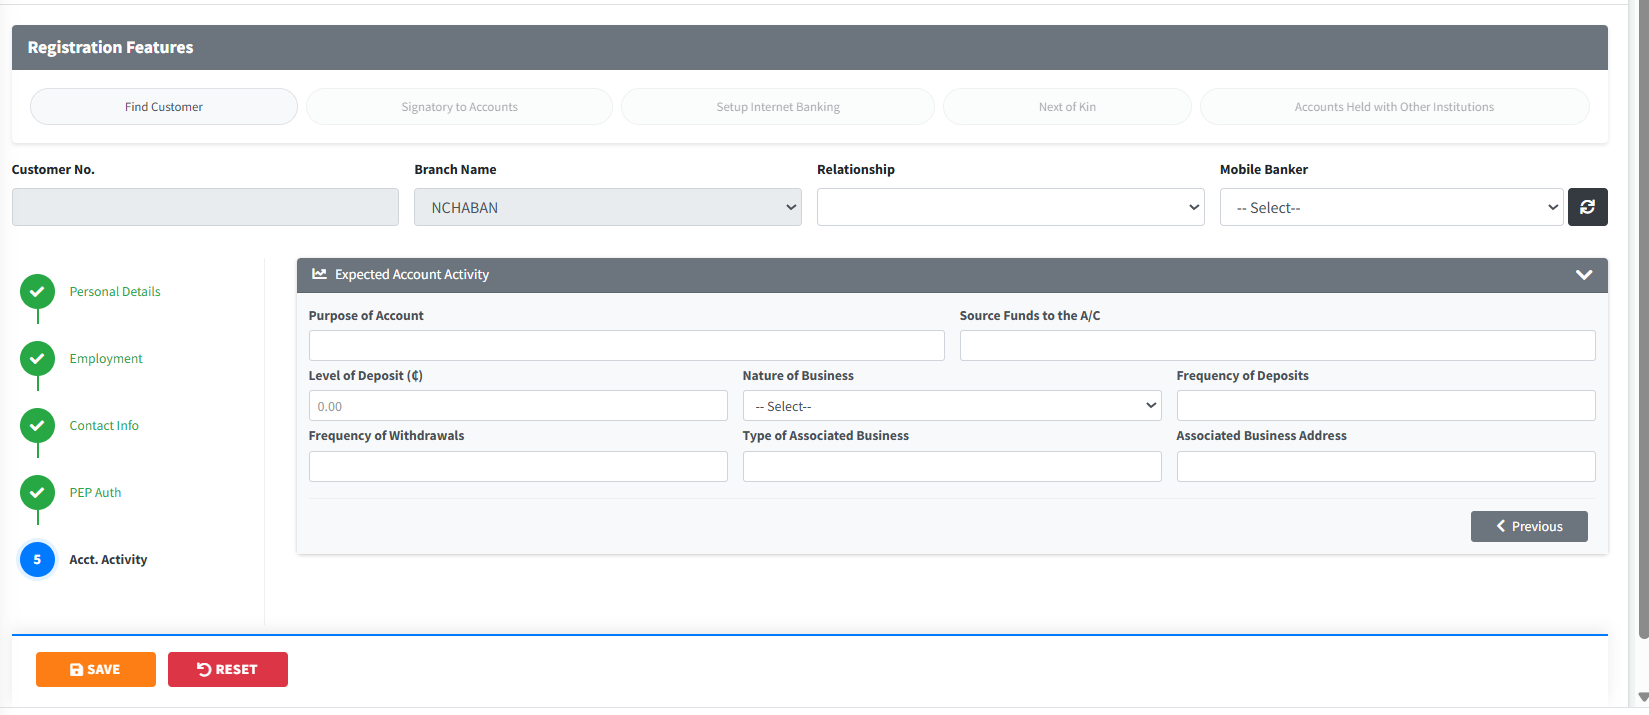
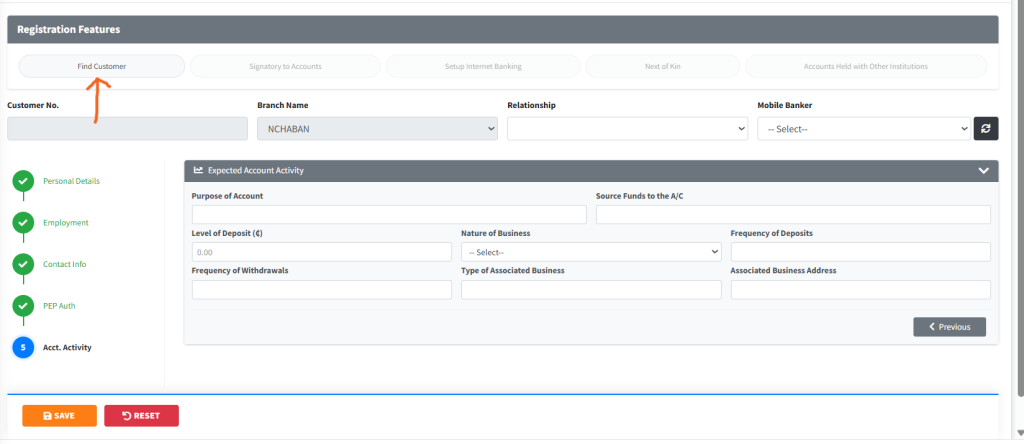
- Acct. Activity: Define the expected monthly volume and source of funds.
Step 3 — Entity (Corporate) Onboarding
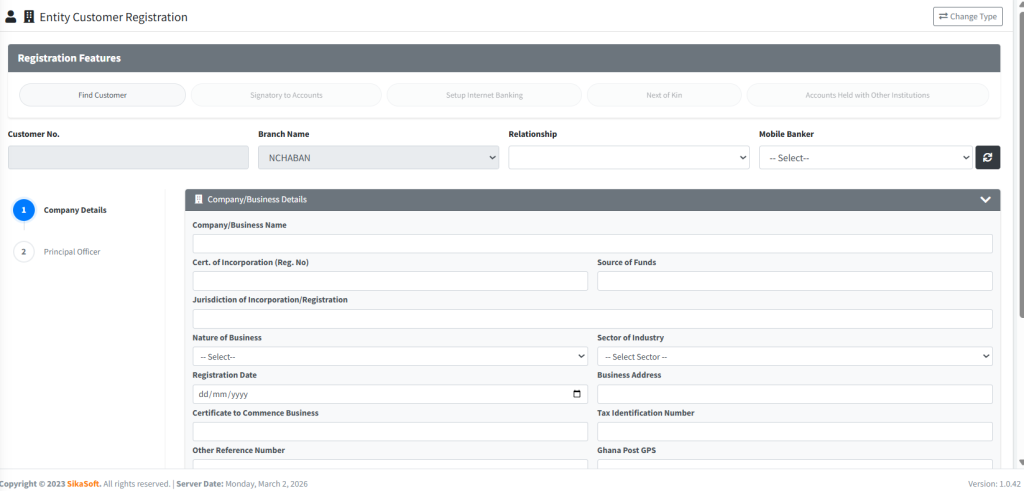
- For businesses, the wizard shifts to capturing Company Details (Registration No., Date of Incorporation).
- Use the Details of Directors/Executives button in the “Registration Features” bar to add corporate officers.
- Add Shareholders Information for beneficial ownership tracking.
Step 4 — Adding Extended Features Before saving, use the “Registration Features” pills at the top to add:

- Next of Kin: Individual beneficiaries for the account.
- Signatory Accounts: Define who can authorize transactions (especially for joint or corporate accounts).
- Internet Banking: Setup digital access credentials.
Step 5 — Saving & Finalizing
- Once all steps are marked with a green checkmark in the roadmap, the Save button will become active.
- Click Post Registration.
- System Action: The record is assigned a temporary status and sent to the Registration Authorization queue for supervisor review.
Step 6 — Managing Existing Records
- Use the Find Customer button to search for existing registrations.
- Recalled records can be edited or upgraded (e.g., adding a new Next of Kin) before final authorization.
KEY NOTES
- Mandatory Fields: Fields marked with a red highlight or in the first step of the wizard are usually mandatory. The system will prevent progression if they are empty.
- Wizard Mode: You cannot skip directly to “Step 5” from “Step 1”. You must navigate through the roadmap to ensure all disclosures are reviewed.
- Dual Control: Registrations performed by a frontline officer (Inputer) cannot be authorized by that same officer. They must be vetted by a supervisor via the Registration Auth page.
- Branch Locking: Customers are automatically linked to the branch of the officer performing the registration, but can be managed centrally if authorized.