
The Upload Customer (Transaction Upload) module provides a streamlined solution for bulk importing financial data into Sikasoft via Excel files. This utility allows administrators to seamlessly process large volumes of transactions—such as payroll deductions, dividends, or bulk deposits—by debiting a single source (either a Customer Account or a General Ledger) and crediting the respective items specified within the uploaded .xlsx or .xls spreadsheet.
PURPOSE
- Eliminate manual data entry for large batch transactions.
- Rapidly process Excel files mapping account numbers to transaction amounts and commissions.
- Provide a clear, visual preview of spreadsheet contents directly within the system before authorization.
- Support both Controller-style direct customer uploads and General Ledger batch processing.
- Maintain a secure staging environment (Pending/Unauthorized Uploads) where imported data can be reviewed and authorized.
STEP-BY-STEP GUIDE
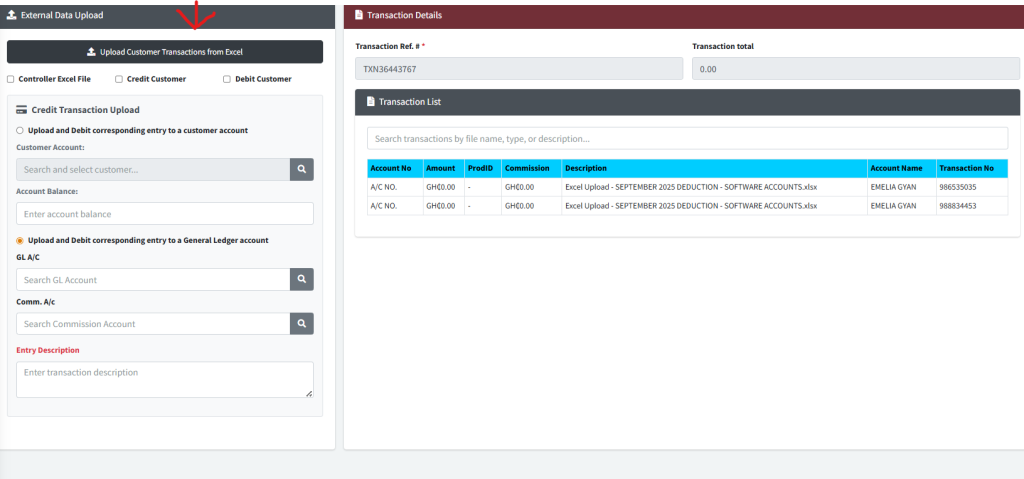
Step 1 — Configuring the Upload Source
- Navigate to the Back Office Module and find the Transaction Upload page via the main navigation sidebar.
- In the left panel (External Data Upload), begin by selecting specific behavior flags beneath the main upload button if required:
- Controller Excel File: Check this if specific controller-style formatting applies.
- Credit / Debit Customer: Check these to define the primary orientation of the transaction batch.
- Under the Credit Transaction Upload section, define the source of the funds to be distributed:
- Option A: Select “Upload and Debit corresponding entry to a customer account” and use the finder to select the specific source customer account. Enter the current Account Balance for validation.
- Option B: Select “Upload and Debit corresponding entry to a General Ledger account” and use the finders to select the source GL A/C and, optionally, a Comm. A/c (Commission Account).
- Enter an Entry Description (e.g., “April 2026 Payroll Deductions”).
Step 2 — Uploading the Excel File
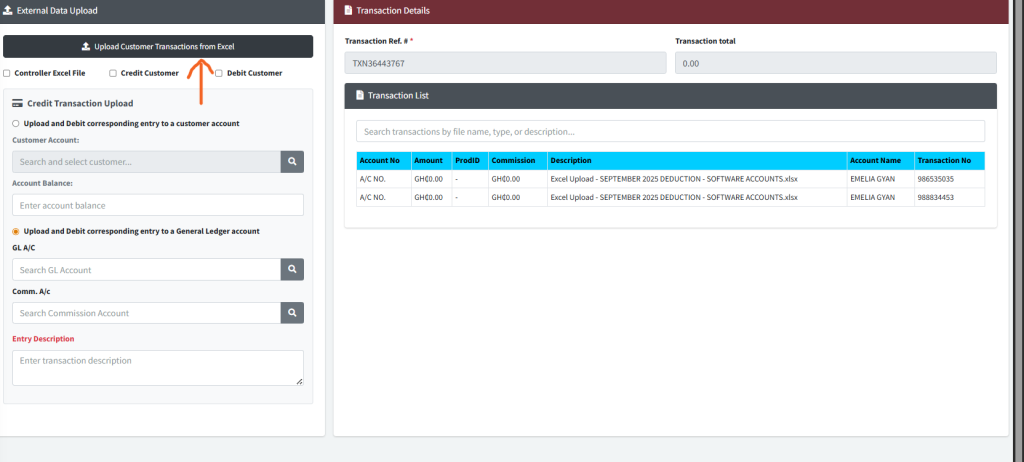
- At the top of the left panel, click the prominent, dark Upload Customer Transactions from Excel button.
- A system file dialogue will appear. Select the
.xlsxor.xlsfile containing your transaction payload. (Note: The system automatically matches standard headers like ‘Amount’, ‘Account Number’, ‘Commission’, etc.) - The system will read the file and present a detailed Excel Upload Preview modal listing every processed row, the recognized amounts, and calculated commissions.
- Review the preview grid. If correct, click Yes, Process Data.
Step 3 — Reviewing the Transaction Batch
- Once processed, the batch is moved into an unauthorized state.
- You can view your newly pending batch in the right-hand panel (Transaction List).
- The Transaction Ref. # and Transaction total at the top of the panel will reflect the sum of the processed spreadsheet.
- From here, click on the transaction row to view specific details or navigate to the Authorization module to finalize the batch against the live ledger.

KEY NOTES
- Supported Formats: The system strictly requires
.xlsxor.xlsfiles. Ensure your data doesn’t contain overly complex macros or formatting that could disrupt the parser. - Smart Column Mapping: The system utilizes an intelligent mapper. It will look for column headers like “Account Number”, “A/C No”, “Shares”, “Savings”, or “Total Deduc” to automatically categorize your data.
- Double Check Totals: Always ensure the “Transaction total” generated in the right panel matches the expected grand total of the spreadsheet you are attempting to upload.